RDR2 Treasure Maps: Every Location and Reward
RDR2's major treasure chains lead to Gold Bars, a unique revolver and other rewards. Here is every map in order and exactly where to search next.
- Jack Hall Gang
- 2 gold bars
- High Stakes
- 3 gold bars
- Poisonous Trail
- 4 gold bars
- Landmarks of Riches
- 6 gold bars
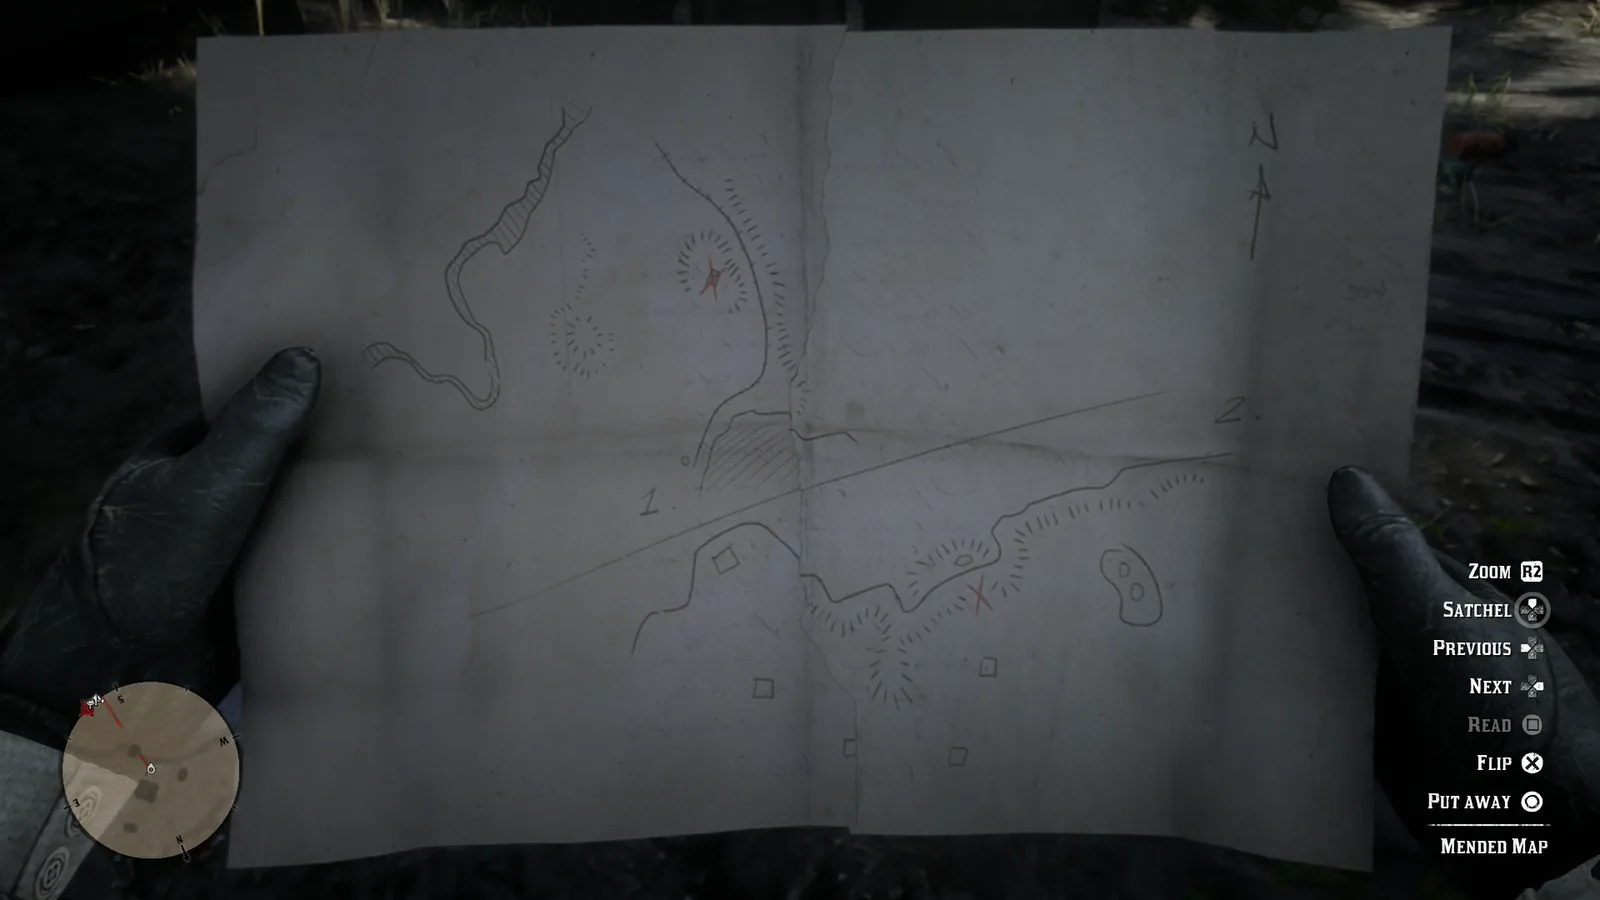
RDR2 treasure maps work as chains.
Find a map.
Read the drawing.
Reach the location.
Find the next clue or the final treasure.
Treasure maps form a chain. Skip a link and you normally cannot reach the reward.
Main treasure hunts
| Treasure | Steps | Reward |
|---|---|---|
| Jack Hall Gang | 3 maps | 2 Gold Bars |
| High Stakes | 3 maps | 3 Gold Bars |
| Poisonous Trail | 3 maps | 4 Gold Bars |
| Landmarks of Riches | 4 maps | 6 Gold Bars |
| Elemental Trail | 3 maps | 1 Gold Bar + Crow Beak Trinket |
| Torn / Mended Map | 2 halves | Otis Miller’s Revolver |
| Sketched Map | 1 map | 1 Gold Ingot |
| Le Trésor des Morts | Bonus content | 5 Gold Bars |
Jack Hall Gang — 2 Gold Bars
Maximo → Caliban’s Seat → Cotorra Springs → O’Creagh’s Run
Available from Chapter 2.
Map 1 — Maximo
Find Maximo on a ridge near Flatneck Station overlooking the Dakota River.
He offers the map for $10.
If you refuse once, he can lower the price.
Buy it and move on.
If Maximo is gone
The map can eventually become available through a Fence.
Map 2 — Caliban’s Seat
The first drawing points to Caliban’s Seat.
Method
- Ride to the upper section.
- Find the narrow route down the side.
- Follow the ledge.
- Jump the gap.
- Search the crack in the rock wall.
Take the next map.
Map 3 — Cotorra Springs
Ride to Cotorra Springs.
Find the stone piles near the geysers.
Search the correct pile.
Take Map 3.
Treasure — O’Creagh’s Run
Go to O’Creagh’s Run.
Reach the small island.
Search the rock.
Reward:
2 Gold Bars = $1,000.
High Stakes — 3 Gold Bars
Treasure Hunter → Cumberland Falls → Barrow Lagoon → Bacchus Station
This chain begins with a random treasure hunter.
Map 1 — Treasure Hunter
After treasure hunting becomes active, a man carrying a map can appear in West Elizabeth.
He may run when you approach.
Get the map from him.
If the encounter is repeatedly missed, the map can later become available through a Fence.
Map 2 — Cumberland Falls
Go to Cumberland Falls.
Walk behind the waterfall.
Search the rock hiding place.
Take Map 2.
Map 3 — Barrow Lagoon
Go to Barrow Lagoon.
Find the fallen log spanning the rocks.
Walk onto it.
Search for the next map.
Treasure — Bacchus Station
The final clue points to the cliffs near Bacchus Station.
Method
- Reach the high ground.
- Find the path onto the ledges.
- Descend carefully.
- Follow the rock wall.
- Search the final crevice.
Reward:
3 Gold Bars = $1,500.
Poisonous Trail — 4 Gold Bars
Cairn Lake → Face Rock → Serpent Mound → Elysian Pool
Excellent early-game money.
Map 1 — Cairn Lodge
Go to Cairn Lake, east of Colter.
Enter the cabin.
Check the lockbox under the bed.
Take the first map.
Map 2 — Face Rock
Go to Face Rock north of Rhodes.
Find the hollow tree near the formation.
Search its base.
Take Map 2.
Map 3 — Serpent Mound
Go to Serpent Mound west of Van Horn.
Find the eye-shaped end of the snake-like rock formation.
Search the center.
Take the final map.
Treasure — Elysian Pool
Go behind the Elysian Pool waterfall.
Method
- Cross behind the water.
- Equip your lantern.
- Enter the cave.
- Descend carefully.
- Follow the tunnels.
- Work into the deeper section.
- Search the final rock stash.
Reward:
4 Gold Bars = $2,000.
Walk around the drops.
Do not sprint.
Landmarks of Riches — 6 Gold Bars
Obelisk → Tiny Church → Mysterious Hill Home → Bolger Glade → Mount Shann
This is the richest standard treasure hunt.
Arthur can complete it.
Map 1 — Obelisk
Go northwest of Owanjila near the western edge of West Elizabeth.
Find the Obelisk.
Inspect its plaque.
Take the first map.
Map 2 — Tiny Church
Ride to the Tiny Church in Bayou Nwa near Lakay.
Climb onto the roof.
Search around the bell.
Take Map 2.
Map 3 — Mysterious Hill Home
Go to Mysterious Hill Home near Donner Falls and Bacchus Station.
Find the damaged/boarded window on the structure.
Search it.
Take Map 3.
Map 4 — Bolger Glade
Go to Bolger Glade east of Braithwaite Manor.
Look for:
- the broken cannon;
- the low hill;
- the hollow tree.
Search the tree.
Take the final clue.
Treasure — Mount Shann
Climb Mount Shann.
Find the stone sundial at the summit.
Search around the seven-o’clock position.
Reward:
6 Gold Bars = $3,000.
Elemental Trail — 1 Gold Bar + Crow Beak Trinket
Sea of Coronado → Greenhollow → Benedict Point → Coot’s Chapel
This treasure hunt requires normal access to New Austin.
That means Epilogue progression.
Map 1 — Sea of Coronado
Go southwest of Tumbleweed near the Sea of Coronado.
A corpse hangs from a rope on the cliff.
- Shoot the rope.
- Let the corpse fall.
- Loot it.
Take Map 1.
Map 2 — Greenhollow
Ride to Greenhollow, east of Lake Don Julio near the San Luis River.
Find the ruined building.
Search the chimney.
Take Map 2.
Map 3 — Benedict Point
Go to Benedict Point.
Find the water tank and the raised wooden trough running toward the railroad.
Climb onto the trough from the hillside.
Walk along it.
Search the marked section.
Take Map 3.
Treasure — Coot’s Chapel
Go to Coot’s Chapel cemetery.
Find the wooden cross below a tree.
Search the loose rock on the grave.
Reward:
- 1 Gold Bar;
- Crow Beak Trinket;
- Special Horse Stimulant;
- Special Horse Medicine.
Torn Treasure Map — Otis Miller’s Revolver
Find two halves.
Either order works.
Half 1 — Hermit Woman
Go to the source of Little Creek River, far northwest of Wallace Station.
Find the isolated cabin.
The woman and her dogs are hostile.
Search a drawer inside.
Take one half.
Half 2 — Manito Glade
Go to Manito Glade, north of Annesburg.
The male hermit is hostile too.
Be careful with his shotgun.
After dealing with him:
- pick up the Rare Shotgun if you want it;
- enter the house;
- search the drawer;
- take the other map half.
The two pieces form the Mended Map.
Treasure — Cholla Springs
The finished map points to a cave in Cholla Springs, near Rattlesnake Hollow and west of Twin Rocks.
Normal access comes in the Epilogue.
Inside:
Otis Miller’s Revolver
plus photographs.
No Gold Bars.
Does it count for Explorer?
No.
Sketched Map — Gold Ingot
This one is also separate from the main Explorer treasure chains.
Get the map
Go to Reed Cottage, north of Annesburg.
Search the fireplace.
Take the Sketched Map.
Treasure — Elysian Pool
Go to the ridge northwest of Elysian Pool.
Find the tree marked with an X.
The map indicates:
20 steps north
then
5 steps east.
Search the inspectable rock.
Reward:
1 Gold Ingot = $300.
Does it count for Explorer?
No.
Le Trésor des Morts — bonus content
This hunt belongs to copies with the relevant pre-order bonus.
If your save does not contain it, your standard game is not missing anything.
The route uses:
- Limpany;
- the Saint Denis train yard;
- an underground passage;
- Saint Denis cemetery.
Reward:
5 Gold Bars = $2,500.
Which treasure maps count for Explorer?
Useful Explorer chains include:
- Jack Hall Gang;
- Poisonous Trail;
- High Stakes;
- Landmarks of Riches;
- Elemental Trail;
- Le Trésor des Morts if available.
Intermediate maps found while solving a chain can increase the Explorer counter.
You do not need nine final treasure chests.
Which maps do not count?
Do not use these for Explorer progression:
- Torn / Mended Map;
- Sketched Map.
Do them for their rewards.
Which treasure hunt should you do first?
To start Explorer
Jack Hall Gang.
Maximo is available early.
For money
Landmarks of Riches.
Six Gold Bars.
For a relatively compact high-value hunt
Poisonous Trail.
Four Gold Bars.
In the Epilogue
Elemental Trail.
You also get the Crow Beak Trinket.
Practical playthrough order
Chapter 2
Complete:
- Jack Hall Gang.
- Poisonous Trail.
- Landmarks of Riches.
- High Stakes when it appears.
That gives you more than enough money and strong Explorer progress.
During Arthur’s story
Collect:
- Sketched Map;
- both Torn Map halves.
You can leave the final Torn treasure for later.
Epilogue
Finish:
- Torn Treasure;
- Elemental Trail.
Treasure maps and 100%
RDR2’s Total Completion checklist requires:
one completed Treasure Hunt.
Just one.
Explorer Challenges will naturally make you solve many more map steps.
Next map not appearing?
Check:
- Do you have the previous map?
- Have you opened it?
- Are you following the correct treasure chain?
- Are you searching the exact interaction point?
- Are you trying to skip a clue?
Follow the chain in order.
Frequently asked questions
What is the best treasure hunt for money?
Landmarks of Riches.
It pays six Gold Bars.
Which hunt can I start first?
Jack Hall Gang with Maximo in Chapter 2.
How much does Poisonous Trail pay?
Four Gold Bars.
How much does High Stakes pay?
Three.
How much does Jack Hall Gang pay?
Two.
What does Elemental Trail give you?
One Gold Bar, the Crow Beak Trinket and horse items.
What does the Torn Treasure Map give you?
Otis Miller’s Revolver.
What does the Sketched Map give you?
One $300 Gold Ingot.
Do Torn and Sketched Maps count toward Explorer?
No.
How many treasure hunts are required for 100%?
The official checklist requires one completed Treasure Hunt.
More RDR2 guides
Sources
Red Dead Wiki — Treasure Maps.
Red Dead Wiki — Explorer Challenges.
Red Dead Wiki — Landmarks of Riches and Elemental Trail.
PowerPyx — Treasure Map Locations & Solutions.
Last verified: October 5, 2026.