Best YouTube Export Settings for Premiere and DaVinci Resolve
For a reliable SDR upload: MP4, H.264 High, the same frame rate as the source, VBR and 48 kHz audio. Then size bitrate around resolution and footage complexity.
- Format
- MP4 · H.264
- 1080p60
- 12 Mbps
- 1440p60
- 24 Mbps
- 4K60
- 53–68 Mbps
For a reliable SDR YouTube upload:
MP4 + H.264 High Profile + the same frame rate as your source + 48 kHz audio.
YouTube still recommends H.264 for uploaded video.
Then set bitrate according to resolution, frame rate and how difficult the footage is to compress.
Quick settings
| Resolution | 24/25/30 fps | 48/50/60 fps |
|---|---|---|
| 1080p | 8 Mbps | 12 Mbps |
| 1440p | 16 Mbps | 24 Mbps |
| 4K | 35–45 Mbps | 53–68 Mbps |
These are YouTube’s current SDR recommendations for uploaded files.
YouTube will encode the video again afterward.
They are not the final bitrate every viewer receives.
These settings are for uploads, not live streaming
YouTube publishes separate guidance for live streaming.
The bitrates are different.
Codec recommendations can differ too.
For example, YouTube currently publishes different 1080p60 live values for AV1/H.265 and H.264.
Do not copy the table in this guide into OBS.
Use your streaming settings for live video.
This page is about exporting a finished file before uploading it.
Base YouTube export settings
Container
MP4
Video
H.264
Profile
High
Scan
Progressive
Bitrate
Variable / VBR
SDR color
BT.709 / Rec.709
Frame rate
Match the source and timeline
Audio
YouTube currently accepts formats including:
- AAC-LC;
- Opus;
- Eclipsa.
For a normal MP4 export from Premiere or Resolve, I would use:
AAC-LC + 48 kHz + 384 kbps stereo.
Keep the original frame rate
Recorded at 60 fps?
Export at 60.
Shot at 25?
Export at 25.
YouTube recommends uploading at the same frame rate used for recording.
Changing a finished 30 fps project to 60 fps at export does not create thirty new real moments every second.
1080p
YouTube recommends:
1080p 24/25/30
8 Mbps
1080p 48/50/60
12 Mbps
For talking heads, tutorials and relatively quiet footage, those are solid starting points.
Difficult gameplay
Some scenes are much harder to compress:
- foliage;
- rain;
- smoke;
- particles;
- confetti;
- film grain;
- rapid movement.
For difficult 1080p60 gameplay, I would often work around:
12–16 Mbps
so the uploaded master is not already breaking apart.
1440p
YouTube recommends:
1440p 24/25/30
16 Mbps
1440p 48/50/60
24 Mbps
If your project is genuinely 1440p, export at 1440p.
Should you upscale 1080p to 1440p?
Some creators use this because YouTube processing can differ.
I would not treat it as a guaranteed quality switch.
Upscaling also cannot recreate source detail that was never captured.
Start with a clean 1080p master.
4K
YouTube recommends:
4K 24/25/30
35–45 Mbps
4K 48/50/60
53–68 Mbps
Large 4K60 files take longer to:
- export;
- upload;
- process.
Do not judge the upload immediately
YouTube often creates lower-resolution versions first.
Higher-quality versions can take longer.
If a fresh 4K upload is only showing 720p:
wait for processing.
H.264 vs H.265 vs AV1
H.264
My default.
YouTube officially recommends it for uploaded video.
It also offers:
- excellent compatibility;
- mature hardware encoders;
- fast exports;
- straightforward Premiere and Resolve workflows.
H.265 / HEVC
YouTube accepts HEVC.
It can achieve similar quality at a lower bitrate than H.264, depending on the encoder and footage.
It becomes attractive when:
- upload size matters;
- your GPU has strong HEVC encoding;
- you use 10-bit;
- you work in HDR.
AV1
AV1 is highly efficient.
YouTube uses it widely in its own delivery pipeline and also documents it for some live workflows.
For ordinary uploaded files, H.264 remains the general published recommendation.
I would treat AV1 as an advanced option.
Use it when your software, GPU and workflow already support it well.
YouTube re-encodes the file
The upload becomes a source master.
YouTube then creates its own versions for different:
- resolutions;
- devices;
- connections;
- playback codecs.
Your job is to give that process a clean source.
Is more bitrate always better?
Only up to a point.
After that you mainly create:
- larger files;
- longer exports;
- longer uploads;
- more storage use.
A static 1080p tutorial does not need a 150 Mbps upload master.
Start with YouTube’s recommendations.
Increase bitrate when the footage actually needs it.
VBR
YouTube recommends variable bitrate.
That fits the material well.
A face against a wall does not need the same number of bits as a forest full of moving leaves.
VBR 1-pass
Fast.
Good enough for many uploads.
VBR 2-pass
Spends more time analyzing the footage and distributing bits.
Useful when you are trying to squeeze quality into a tighter target.
At generous upload bitrates, the difference may be small.
Hardware vs software encoding
Premiere and other editors can use supported hardware encoders for H.264 and H.265.
That makes exports much faster.
Independent testing usually finds relatively small quality differences at sensible bitrates.
The gap becomes more visible with low bitrates and very detailed motion.
My workflow:
- export with hardware;
- test the most difficult minute;
- if it looks bad, export that minute with software;
- compare.
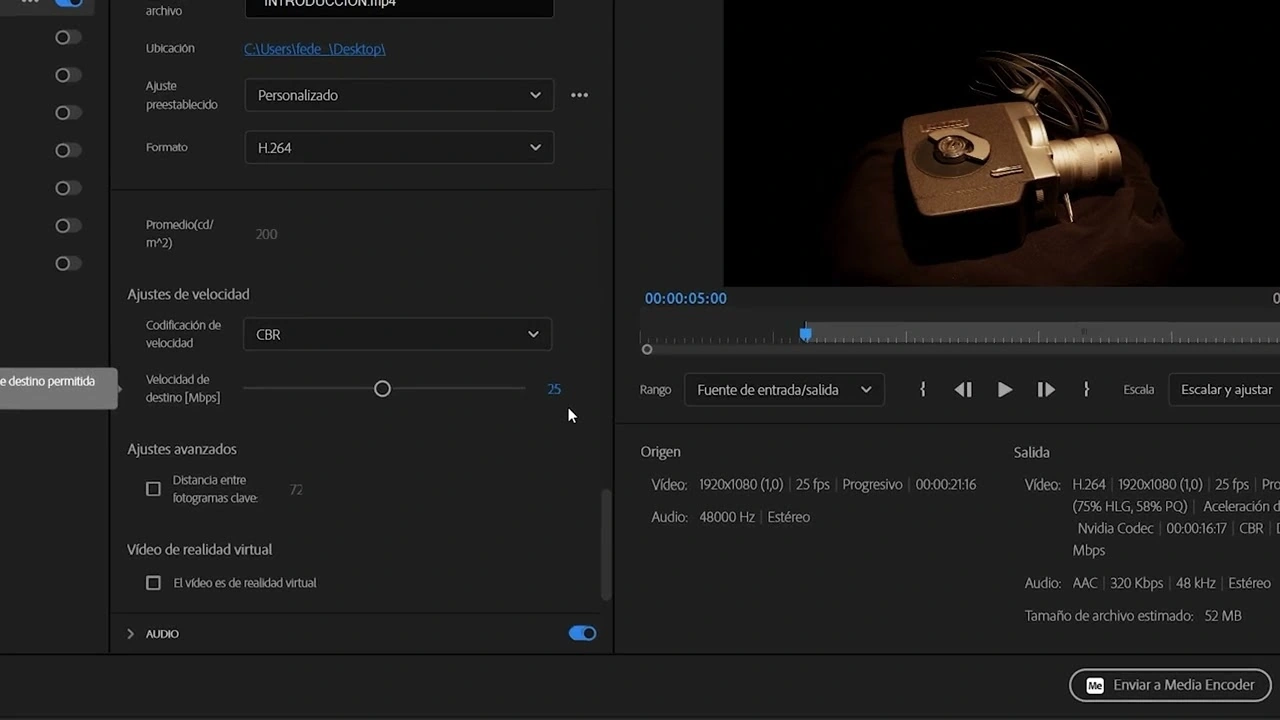
Premiere Pro
Simple route:
- File → Export.
- Format: H.264.
- Preset: Match Source – Adaptive High Bitrate.
- Verify resolution.
- Verify frame rate.
- Set your bitrate.
- AAC audio at 48 kHz.
- Export.
1080p60
Start around:
12 Mbps
Move toward 15–16 Mbps for difficult footage.
1440p60
Start around:
24 Mbps
4K60
53–68 Mbps
DaVinci Resolve
DaVinci Resolve export panel. Match resolution, FPS and bitrate to the video you are uploading.
On the Deliver page:
- Single Clip.
- MP4.
- H.264.
- Match timeline resolution.
- Match timeline frame rate.
- Quality → Restrict to.
- Enter bitrate.
- AAC audio at 48 kHz.
1080p60
12,000 Kb/s
1440p60
24,000 Kb/s
4K60
53,000–68,000 Kb/s
Rec.709
For standard SDR video:
BT.709 / Rec.709
If an upload looks washed out, too dark or noticeably different from the editor, check color management before blaming bitrate.
HDR
HDR needs its own pipeline.
Bit depth, transfer function, metadata and bitrate change.
Do not apply an SDR Rec.709 preset blindly to an HDR master.
Practical presets
1080p60 gameplay
- MP4
- H.264 High
- 1920×1080
- 60 fps
- VBR
- 12–16 Mbps
- AAC-LC
- 48 kHz
- 384 kbps stereo
- Rec.709
1440p60
- MP4
- H.264 High
- 2560×1440
- 60 fps
- VBR
- 24–30 Mbps
- AAC-LC
- 48 kHz
- 384 kbps
- Rec.709
4K60
- MP4
- H.264 High
- 3840×2160
- 60 fps
- VBR
- 53–68 Mbps
- AAC-LC
- 48 kHz
- 384 kbps
- Rec.709
Export one minute first
Pick the worst minute in the project.
Movement.
Fine detail.
Text.
Gameplay.
Facecam.
Music.
Dialogue.
Export it.
Watch it.
Listen to it.
If it survives, render the full video.
Frequently asked questions
What format does YouTube recommend for uploads?
MP4 with H.264 High Profile.
What frame rate should I export?
Match the source and timeline.
What bitrate for 1080p60?
YouTube recommends 12 Mbps for SDR.
1440p60?
24 Mbps.
4K60?
53–68 Mbps.
Does YouTube accept H.265?
Yes.
Should I use AV1?
It can be efficient, but H.264 remains YouTube’s general published recommendation for uploaded files.
What audio settings should I use?
For a normal MP4 workflow: AAC-LC, 48 kHz and 384 kbps stereo.
Are these OBS settings?
No.
Live streaming uses a separate set of recommendations.
More gear and creator guides
Premiere Pro export settings for YouTube
DaVinci Resolve export settings for YouTube
CapCut export settings for YouTube
Sources
YouTube Help — Recommended upload encoding settings
YouTube Help — Live encoder settings
YouTube Help — Supported file formats
YouTube Help — Video quality after upload