CapCut export settings for YouTube: resolution, 60 fps and bitrate
Export at the same resolution and frame rate you recorded and set the bitrate to Custom: 12 Mbps for 1080p60, 24 for 1440p60 and 53 to 68 for 4K60, per YouTube. If the preview looks blurry, check whether Proxy is on first.
- 1080p60
- 12 Mbps
- 1440p60
- 24 Mbps
- 4K60
- 53–68 Mbps
- CapCut bitrate
- Kbps
- Proxy
- Lower preview
- Confirmed
- Unconfirmed
- Master Roshi Technique
- Quick and easy
What these labels mean
- Confirmed
Confirmed means the information comes from its owner: the studio, publisher, manufacturer or platform (Rockstar, Take-Two, Sony, Elgato, YouTube…).
- Unconfirmed
Unconfirmed is everything else: media reports, leaks, estimates, community reconstructions and our own deductions. A rumor remains unconfirmed even when many outlets repeat it.
- Master Roshi Technique
The best trick for completing that objective.
- Quick and easy
The quick route, with the steps needed to keep it simple.
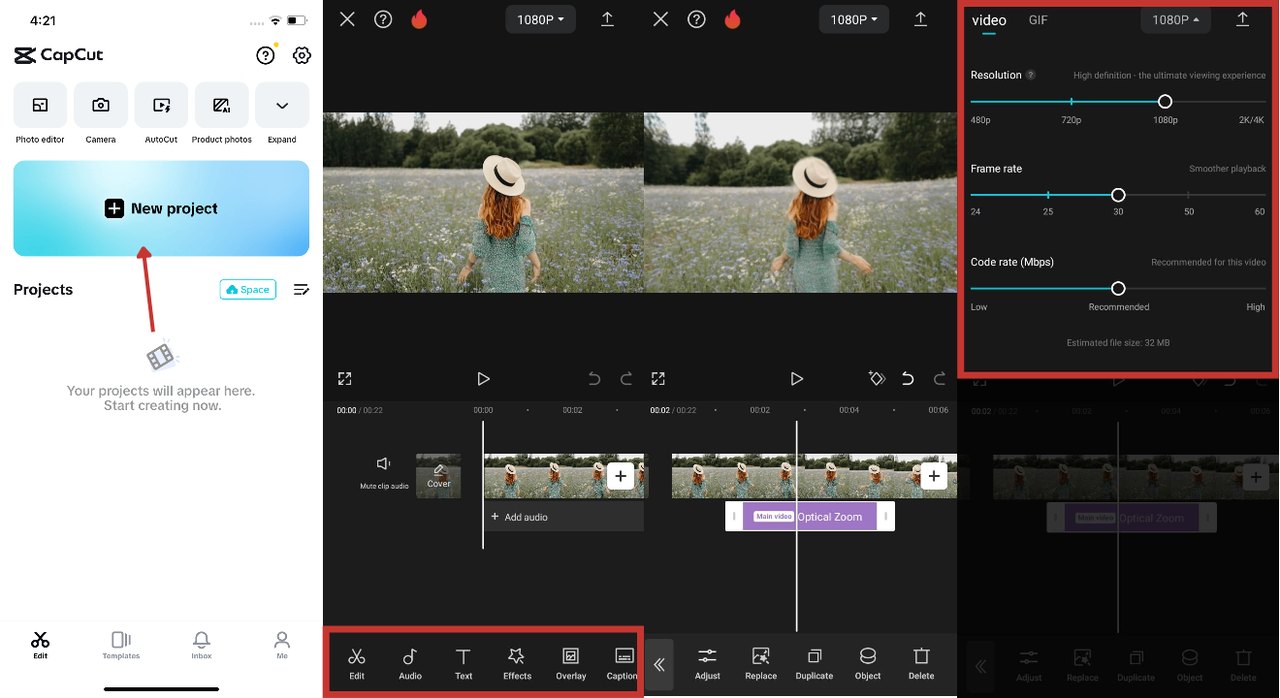
To export from CapCut for YouTube, keep your recording’s resolution and frame rate and set the bitrate to Custom: YouTube recommends 12 Mbps for 1080p at 60 fps, 24 Mbps for 1440p60 and 53 to 68 Mbps for 4K60. Recorded at 1080p60, export at 1080p60. Recorded at 4K60, keep 4K60 when your hardware, your CapCut version and your plan allow it.
If the video looks blurry while you edit, check CapCut’s Proxy setting first, because it can lower preview quality. If you’re still picking an editor, our comparison is in the best video editing software for YouTube.
YouTube’s recommended bitrate for each resolution
These figures come from YouTube’s recommended upload encoding settings for SDR video, the standard non-HDR kind:
| Resolution | 24–30 fps | 48–60 fps |
|---|---|---|
| 1080p | 8 Mbps | 12 Mbps |
| 1440p | 16 Mbps | 24 Mbps |
| 4K | 35–45 Mbps | 53–68 Mbps |
CapCut takes a custom bitrate in Kbps, so multiply by a thousand: 12 Mbps is 12,000 Kbps, 24 Mbps is 24,000, and the 4K60 range runs from 53,000 to 68,000.
How to export in CapCut
Click Export and check three fields: resolution, frame rate and bit rate. On desktop, CapCut’s help page says you can choose 2K (2560×1440) or 4K (3840×2160), set the frame rate up to 60 fps depending on your source, and adjust the bitrate, with the note that higher means better quality and a larger file.
For the bitrate, another CapCut help page spells it out: in Export, set Bit rate to Custom and enter a value in Kbps. For 1080p60 gameplay that means 1920×1080, 60 fps and 12,000 Kbps. Open the file before you upload it.
What resolution, frame rate and bitrate mean
Resolution is how many little squares make up the picture: 1920×1080 at 1080p, 2560×1440 at 1440p and 3840×2160 at 4K. Blowing up a small image doesn’t invent detail. If you recorded something soft at 1080p, exporting it at 4K won’t reveal hair that was never visible.
Frame rate is frames per second: a 60 fps video shows 60 images every second, and you feel it in driving, shooters, camera turns and combat. YouTube asks you to upload at the frame rate you recorded. Recorded at 60, export at 60; recorded at 30, use 30. Converting 30 to 60 on export can’t recover frames you never captured.
Bitrate is the amount of data each second of video gets to use. A still wall fits in a small box. A forest in the rain, with grass, water, smoke, a speeding car and a spinning camera, needs a much bigger one. Starve it and you get blocks, smears, broken edges and grass turned to mush.
My setup for 1080p60 gameplay
If I had to export a gameplay video for YouTube from CapCut right now:
- Resolution: 1920×1080
- Frame rate: 60, the same as the recording
- Bit rate: Custom, 12,000 Kbps
For 1440p60, use 2560×1440 and 24,000 Kbps. For 4K60, 3840×2160 and 53,000 to 68,000 Kbps. Export one minute before you render an hour. Pick a scene with grass, water, fast motion or small text, open it outside CapCut, and if it holds up, export the whole video.
4K60 in CapCut depends on your setup
According to CapCut’s help, whether you can export in 2K or 4K depends on your device, operating system and which CapCut you use: desktop, web or mobile. Another page lists why the option can be missing, and an easy one to overlook is a project timeline set to 1080p, for example after starting from a 9:16 TikTok template. Some options can also depend on your plan.
Before you build a whole project around 4K60, open the export screen and see what your copy of CapCut offers. I wouldn’t pay for a plan just because an old tutorial says you need it. At 4K, files get big and take longer to export, upload and process: YouTube says a 60-minute 4K video at 30 fps can take up to 4 hours to fully process, and longer at 60 fps.
Proxy makes the preview look worse
CapCut says so in its help page on quality changes after export: Proxy is designed to improve playback performance, and it may lower preview quality. Picture a 40-pound box. To work faster, CapCut packs the same contents into a small one and you move that around. The original stays put, and the exported file is built from the settings you chose.
Before you decide you’ve wrecked your footage, check whether Proxy is on. In CapCut for PC it’s under Menu > Settings > Performance. Turn it off and look again. Then judge the real file anyway: export thirty seconds, open them outside CapCut and watch full screen.
If the exported video looks blurry
Start with the source. CapCut’s guide to blurry videos lists three source-side causes: low-resolution footage, over-compression during recording and too many filters or effects. If the clip was already soft, CapCut can only make it bigger. Fix the capture before you edit.
If the source looks good and the export doesn’t, check resolution, frame rate and bitrate. Raise the custom bitrate and export a short clip again. The same CapCut guide recommends checking the result in an external player, and on desktop it suggests disabling hardware acceleration if the output looks compressed.
If the file looks good on your PC and blurry on YouTube, CapCut did its job. YouTube processes a low-quality version first and higher resolutions arrive later. The full breakdown is in why YouTube makes your video look blurry.
When the bitrate is too low, raising it helps a lot. Past a certain point the file already has enough information, and pushing higher grows the file far faster than the quality, since YouTube compresses everything you upload again. Use YouTube’s table as a starting point and decide by looking at the result.
Five-step check before you upload
- Check the resolution of your source video.
- Keep its frame rate.
- Set the bitrate from the table, in Kbps.
- Export thirty seconds.
- Watch that file outside CapCut, full screen.
If it looks right, export the full video and upload it. The same numbers work in Premiere Pro and DaVinci Resolve, and if you record with OBS, your starting quality is set in our best OBS settings for gaming.
Primary sources: YouTube, recommended upload encoding settings and processing of uploaded videos; CapCut, how to export 2K/4K videos, why there’s no 2K/4K export option, why video quality changes after exporting and how to fix blurry videos.
Last checked: October 1, 2026.